Domains
You send from your own domain. Settings > Domains is where you add it, get the DNS records that prove you control it, check them and send a first test. Domains and DNS in the developer docs explains the same records from the API's point of view.
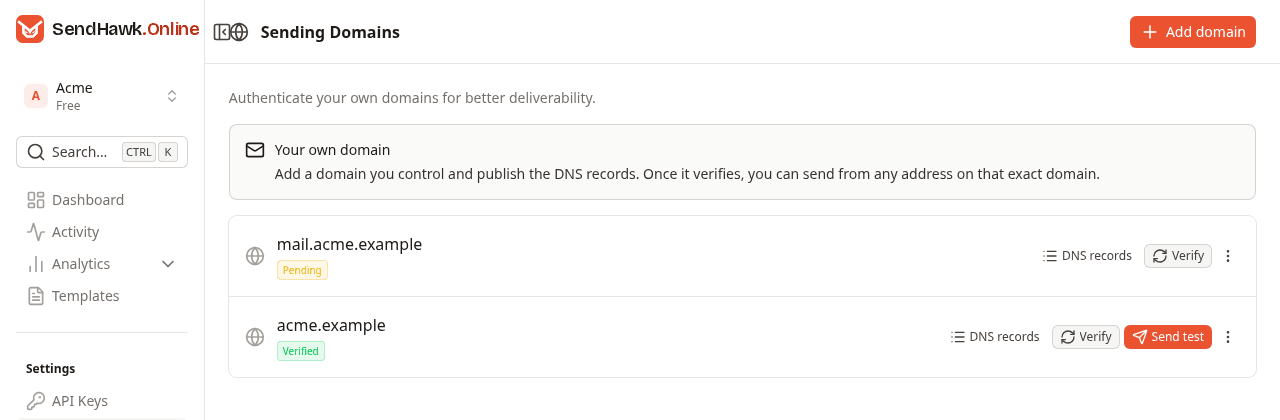
Every domain row has:
| Control | What it does |
|---|---|
| Status badge | Pending, Verified or Failed, see Verify. |
| DNS records | Opens the records to publish, their status, and the tracking switches. |
| Verify | Asks Amazon SES whether it has found the records and updates the status. |
| Send test | Only on a verified domain: sends one email to yourself, see Send a test. |
| Menu (three dots) | Delete, see Delete a domain. |
Owners and admins can add, verify, test and delete domains and change tracking. Developers and viewers see the same page and the records, but these actions are refused for them. See roles.
Add a domain
- Click Add domain at the top right.
- Enter exactly the domain that will come after the
@in your sender addresses, for exampleyourdomain.com. To send ashello@mail.yourdomain.com, entermail.yourdomain.cominstead: a subdomain is a domain of its own, with its own records. - Click Add domain.
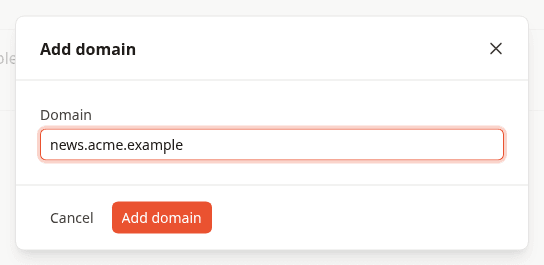
SendHawk.Online registers the domain with Amazon SES, which issues the DKIM keys, and the dialog switches to the DNS records to publish. Close it whenever you like: the records stay available behind DNS records.
The domain is refused, and an error message appears instead, when:
- it is not a plain domain name: it needs at least one dot, and no
https://, path, spaces or@; - it is reserved:
sendhawk.onlineandamazonses.com,amazonaws.comand their subdomains; - it is already added, to this workspace or to another SendHawk.Online account, or registered elsewhere with the sending provider. A domain can belong to one workspace only. If it is yours and someone else holds it, contact support.
The DNS records
Click DNS records on a domain to see what to publish:
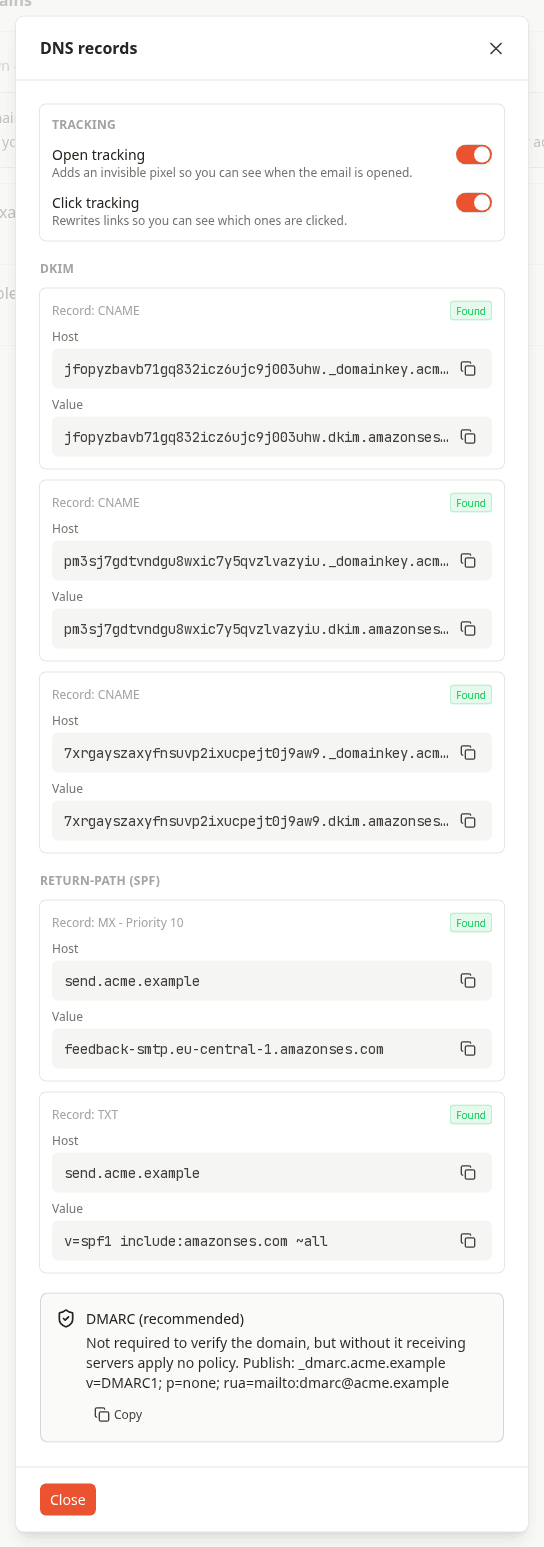
Each record shows its type, a Host (the name) and a Value, each with a copy button, and a badge: Found once Amazon SES has found it, Waiting until then. Hosts and values are shown in full; the copy button is still the safest way to move them into your DNS provider, since a mistyped character keeps the record from being found.
Every domain gets the same five records, with your domain and its own DKIM tokens filled in:
| Group | Type | Host | Value | What it does |
|---|---|---|---|---|
| DKIM | CNAME | <token1>._domainkey.yourdomain.com | <token1>.dkim.amazonses.com | Lets Amazon SES sign every email with a key it manages and rotates for you. These three records are what verify the domain. |
| DKIM | CNAME | <token2>._domainkey.yourdomain.com | <token2>.dkim.amazonses.com | The second of the three keys. |
| DKIM | CNAME | <token3>._domainkey.yourdomain.com | <token3>.dkim.amazonses.com | The third of the three keys. |
| Return-Path (SPF) | MX | send.yourdomain.com | feedback-smtp.eu-central-1.amazonses.com, priority 10 | Makes send.yourdomain.com the envelope sender, so bounces come back through it. |
| Return-Path (SPF) | TXT | send.yourdomain.com | v=spf1 include:amazonses.com ~all | Allows Amazon SES to send for send.yourdomain.com, so SPF passes for your own domain instead of amazonses.com. |
The two Return-Path records live on the send subdomain, so they never touch the MX or SPF records of your main domain: mail you already receive keeps working. Until the MX record is found, Amazon SES keeps using its own return path, so sending works but SPF does not yet line up with your domain.
The dialog does not ask for a particular TTL. Your DNS provider's default is fine.
DMARC (recommended)
The box under the records suggests a DMARC record. It is not needed to verify the domain and SendHawk.Online does not check it, but without one receiving servers apply no policy to mail that fails authentication. Its Copy button copies the value:
| Type | Host | Value |
|---|---|---|
TXT | _dmarc.yourdomain.com | v=DMARC1; p=none; rua=mailto:dmarc@yourdomain.com |
p=none only collects reports, sent to the rua address, so make sure that mailbox exists. A domain has one DMARC record: if _dmarc.yourdomain.com already exists, keep it rather than adding a second. Domains and DNS says when to tighten the policy.
Publish the records at your DNS provider
Log in where your domain's DNS is managed. That is usually where you bought the domain, unless you moved its nameservers to a service such as Cloudflare. Add five records, one per row above, copying Host and Value from the dashboard.
Every provider names the fields a little differently: Type, then Name or Host, then Value, Target, Points to or Content, and for the MX record a Priority, which is 10.
abc._domainkey.yourdomain.com there produces abc._domainkey.yourdomain.com.yourdomain.com, which Amazon SES never finds. If your provider adds the domain itself (it often shows .yourdomain.com next to the field), enter only the part before your domain: abc._domainkey for a DKIM record, send for the two Return-Path records.Cloudflare
Open your domain, then DNS > Records, and click Add record for each one: choose the Type, enter the Name and the value, and Save. The name can be the part before your domain, such as send.
Set Proxy status to DNS only (grey cloud) on the three DKIM CNAME records. Cloudflare's own guidance is that records used to prove domain ownership or for email should not be proxied, and it may warn about proxying a DKIM CNAME. MX and TXT records are always DNS only. See Cloudflare's proxy status documentation.
GoDaddy
Open the domain's DNS records and add a record per row. In GoDaddy the Name is only the part before your domain, without the domain itself, so enter abc._domainkey and send, and put the dashboard's value in Value. See GoDaddy's guide to adding a CNAME record. Add the MX and TXT records from the same page, choosing MX or TXT as the type.
Hosting control panels
Hosting companies usually give you a DNS editor in their control panel, under a name like DNS Zone Editor, DNS management or DNS records. cPanel's Zone Editor, for example, adds your domain to the name you enter (cPanel Zone Editor), so enter only the part before your domain there too.
If the records already in the editor end with a dot, such as www.yourdomain.com., the panel expects full names: enter the whole host and end it with a dot, for example send.yourdomain.com.. The MX value is a host name as well, so it gets the trailing dot too: feedback-smtp.eu-central-1.amazonses.com..
Verify
After publishing the records, click Verify on the domain. SendHawk.Online asks Amazon SES what it has found, updates the domain's status and each record's badge, and tells you the outcome:
| Message | Status | Meaning |
|---|---|---|
| Domain verified | Verified | The DKIM records were found. You can send from any address on this domain. |
| Records not found yet. DNS changes can take a few minutes. | Pending | Amazon SES has not found the DKIM records yet. Normal right after publishing, not a failure. |
| The provider could not verify these records. | Failed | Amazon SES reported that verification failed. See troubleshooting. |
The status only changes when someone clicks Verify: SendHawk.Online does not check in the background, so come back and click it again later. A verified domain stays verified when a later check is still pending; only a reported failure takes it back down.
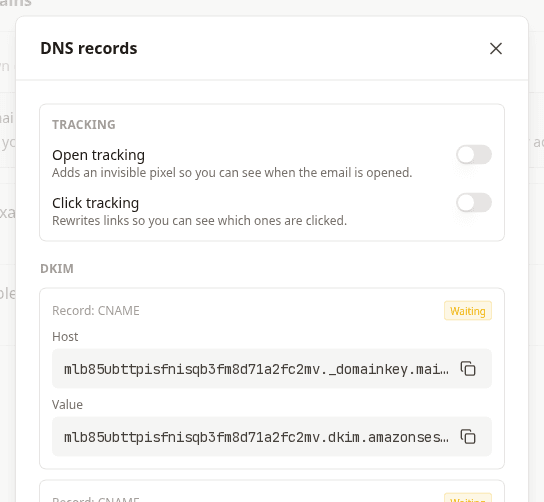
The DKIM records and the Return-Path records are checked separately, so DKIM can show Found while the MX and TXT still show Waiting. The domain verifies, and can send, as soon as DKIM is found.
How long it takes
Often a few minutes after you publish the records. Amazon SES says that in rare cases it can take up to 72 hours for the records to become visible to it (Troubleshooting DKIM problems in Amazon SES). A domain that is still pending shows Waiting on its records:
Send a test
On a verified domain, click Send test:
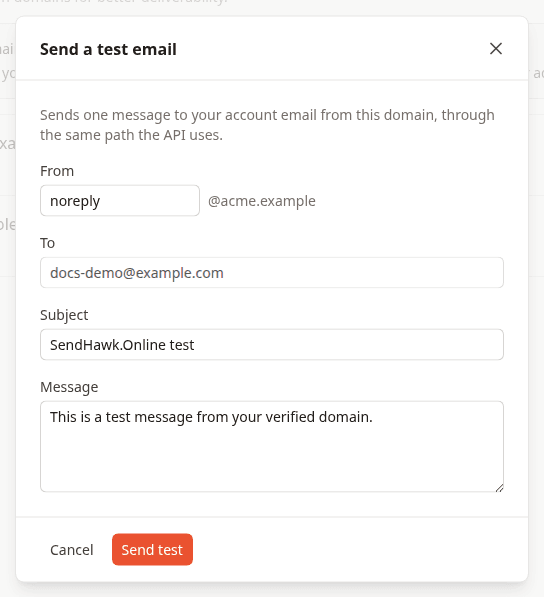
| Field | |
|---|---|
| From | The part before the @, noreply unless you change it. Letters, digits and ., _, +, -, not starting or ending with a dot. |
| To | Always your own account address. It cannot be changed, so the dashboard cannot be used to email anyone else. |
| Subject | Up to 200 characters. |
| Message | Plain text, up to 5,000 characters. |
Send test sends it through exactly the same path as the API: the domain must be verified, a suppressed recipient is refused, it counts toward your monthly volume, and it appears in Activity. The message is plain text, so open and click tracking do not apply to it.
Open and click tracking
The top of the DNS records dialog holds two switches for this domain, both off by default:
- Open tracking adds an invisible image to the HTML of each email, so you see when it is opened.
- Click tracking rewrites the links in the HTML, so you see which ones are clicked.
A switch saves as soon as you flip it ("Tracking updated"), and applies to emails sent from then on. If saving fails, the switch flips back. Open and click tracking explains what changes in your email and when to leave tracking off; Engagement shows the results.
Delete a domain
Open the menu (three dots) on the domain and choose Delete. Type the domain name to confirm, then click Delete:
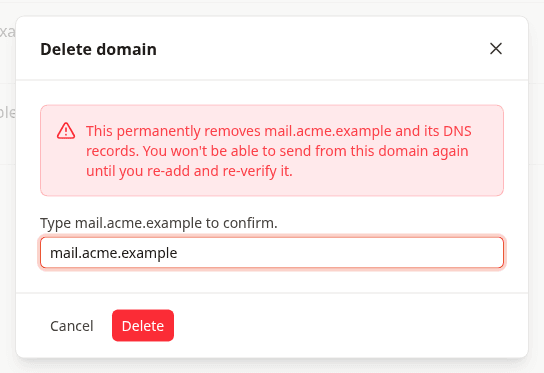
Sending from the domain stops immediately. Past emails stay in Activity. To use the domain again, add it again: it gets a new set of DKIM records to publish, and the old ones no longer count.
Troubleshooting
Pending for hours. Query the records yourself; each command should print the value from the dashboard:
dig +short CNAME <token1>._domainkey.yourdomain.com
dig +short MX send.yourdomain.com
dig +short TXT send.yourdomain.com
Nothing printed usually means a typo, a doubled name, or a record added at a provider that does not serve your domain's DNS.
There is already an SPF record at send.yourdomain.com. A name can carry only one SPF record. Add include:amazonses.com to the existing one instead of creating a second TXT record that starts with v=spf1.
Failed. Correct the records, wait for DNS to update and click Verify again. If it stays failed, delete the domain and add it again, which issues new DKIM records.
Sending answers The "from" domain is not verified for sending in this workspace. The part after the @ in your from address must exactly match a Verified domain of the workspace your API key belongs to. See Domains and DNS.