Getting around
The dashboard is where you set up sending and watch what happens to your email: domains, API keys, templates, webhooks and your team on one side, every email and its statistics on the other. This guide walks through it screen by screen. Every page shows the data of one workspace at a time, the one named at the top of the sidebar.
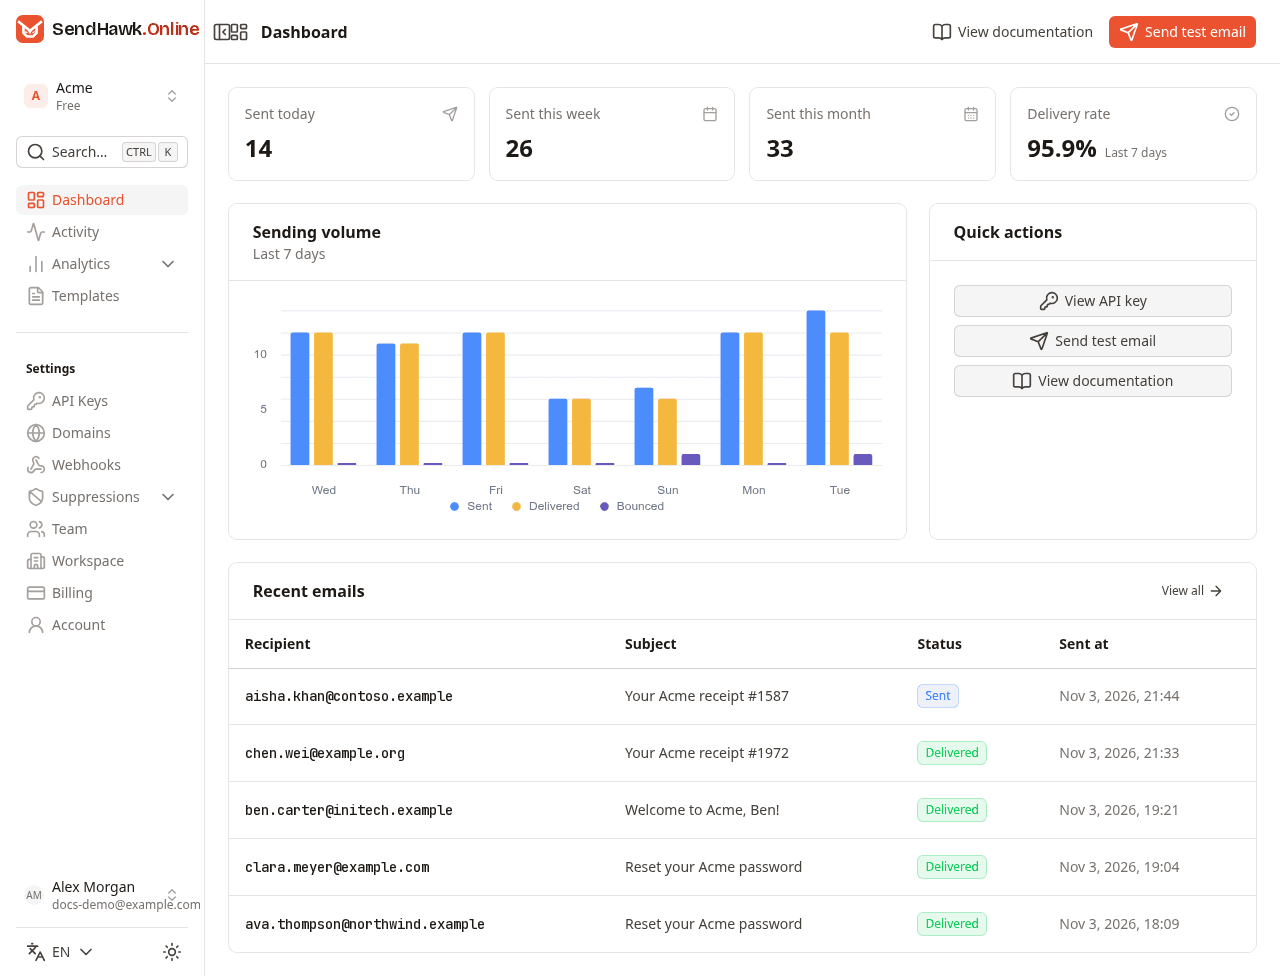
The sidebar
From top to bottom:
- The logo takes you back to the Dashboard.
- The workspace switcher shows the current workspace and its plan. See Switch workspaces.
- Search opens a list of every page, see Search.
- Dashboard, Activity, Analytics (with Overview, Deliverability and Engagement) and Templates are where you work with your email.
- Under Settings: API Keys, Domains, Webhooks, Suppressions (with Bounces, Complaints and Unsubscribes), Team, Workspace, Billing and Account.
- At the bottom, your name opens the user menu, the language button switches the dashboard between nine languages, and the sun or moon button switches between light and dark mode. This documentation stays in English in every language; only the menus around it are translated.
Switch workspaces
A workspace holds its own domains, API keys, templates, emails, webhooks, suppressions and team. Click the workspace name at the top of the sidebar to open the switcher:
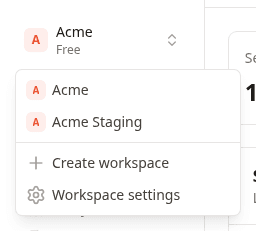
- Pick a workspace to switch every page to it. The dashboard remembers the choice in this browser.
- Create workspace asks for a name and creates an empty workspace with you as its owner, then switches to it.
- Workspace settings opens the settings of the current workspace.
Only workspaces you have joined are listed. A workspace that invited you appears once you accept the invitation, see Team, roles and invitations.
Search
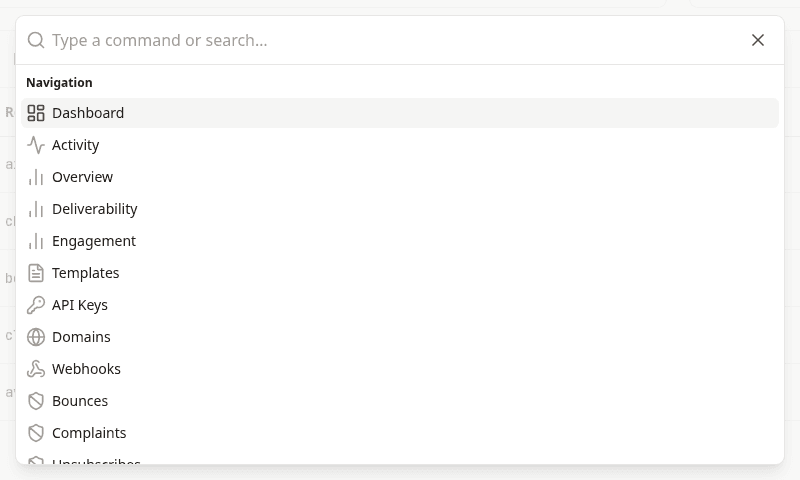
Click Search or press Ctrl + K to open the page list. Type to narrow it down, then pick a page with the mouse or with the arrow keys and Enter.
The user menu
Click your name at the bottom of the sidebar:
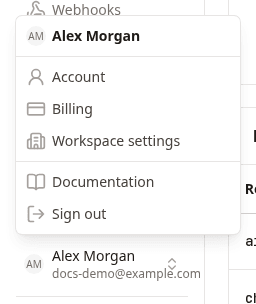
Account, Billing and Workspace settings open those pages, Documentation opens these docs, and Sign out ends your session on this device and takes you to the sign-in page.
Notices above every page
Two notices can appear at the top of any page:
- Confirm your email address while your address is unconfirmed, with Send again for a new link. See Email confirmation.
- Pending invitations when a workspace has invited you, with View invitations. It is not shown on the invitations page itself.

The dashboard page
The Dashboard sums up the current workspace. All figures are counted in UTC days.
| Part | What it shows |
|---|---|
| Sent today | Emails sent since midnight UTC. |
| Sent this week | Emails sent since Monday, midnight UTC. |
| Sent this month | Emails sent in the current calendar month (UTC), the same number your plan's usage meter counts. |
| Delivery rate | Delivered emails as a share of the emails sent in the last 7 days. Analytics explains exactly how it is counted. |
| Sending volume | Sent, delivered and bounced emails per day for the last 7 days. |
| Quick actions | View API key opens API Keys, Send test email opens Domains, where test sends live, and View documentation opens these docs. |
| Recent emails | The five newest emails. Click a row to open the email, or View all for Activity. |
The View documentation and Send test email buttons at the top do the same as the quick actions.
Get started checklist
Until a workspace has sent its first email (the dashboard looks back one year), it shows a Get started checklist where the numbers, the chart and the recent emails would be:
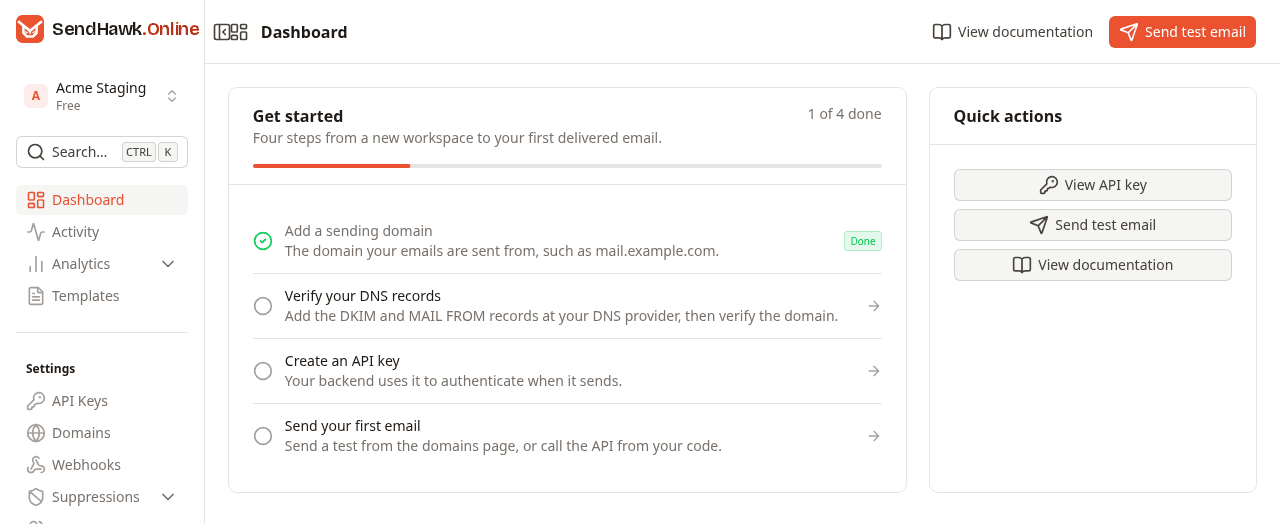
Each step ticks itself off when the workspace reaches it, and clicking a step opens the page where you do it:
- Add a sending domain is done once the workspace has a domain. See Domains.
- Verify your DNS records is done once one of its domains is verified. See Verify.
- Create an API key is done once the workspace has an API key that is not revoked. See API keys.
- Send your first email is done once the workspace has sent an email, from the API or with Send test on the Domains page.
The bar and the 1 of 4 done count show how far you are. Once the first email is sent, the checklist gives way to the numbers.
Welcome steps after sign-up
When you create an account, SendHawk.Online creates a first workspace for you and opens Welcome to SendHawk.Online: four steps that set up the same things as the checklist. Skip for now at the top right takes you to the dashboard at any point, and Back returns to the previous step.
1. Name your workspace
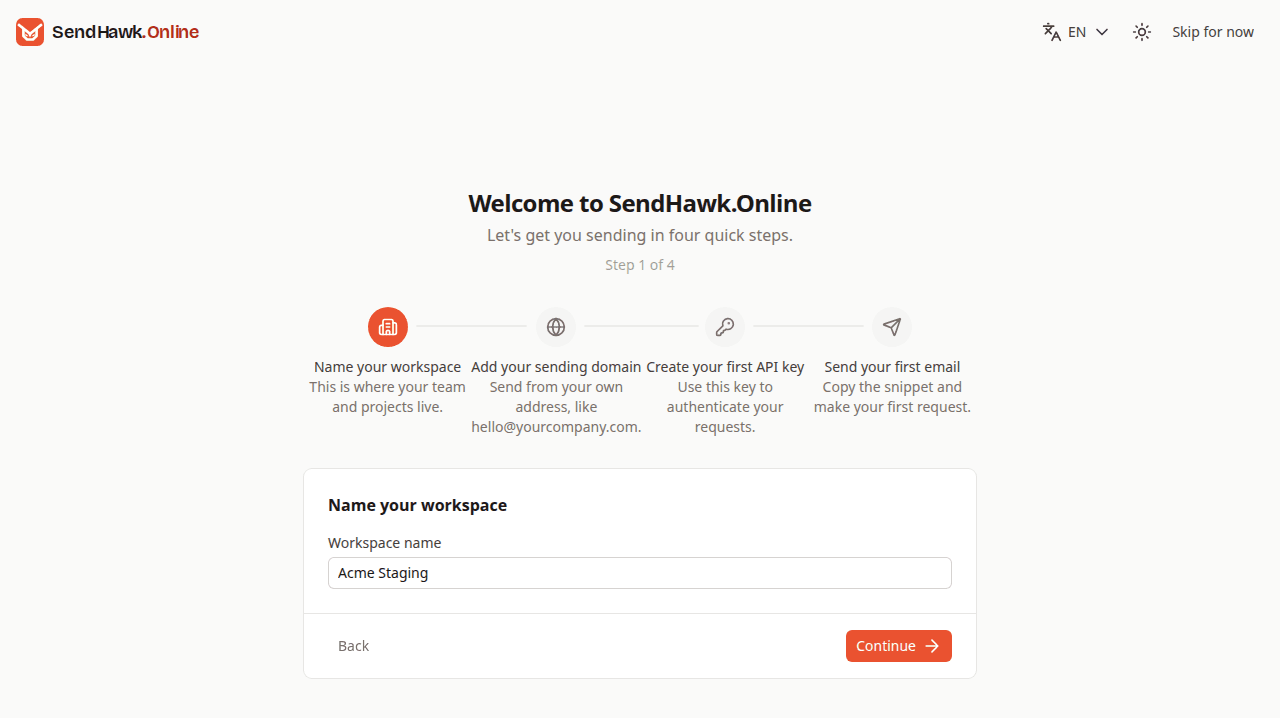
Type the name your team will recognize, usually your company or product, and click Continue. The name is saved, and you can change it later in Workspace settings.
2. Add your sending domain
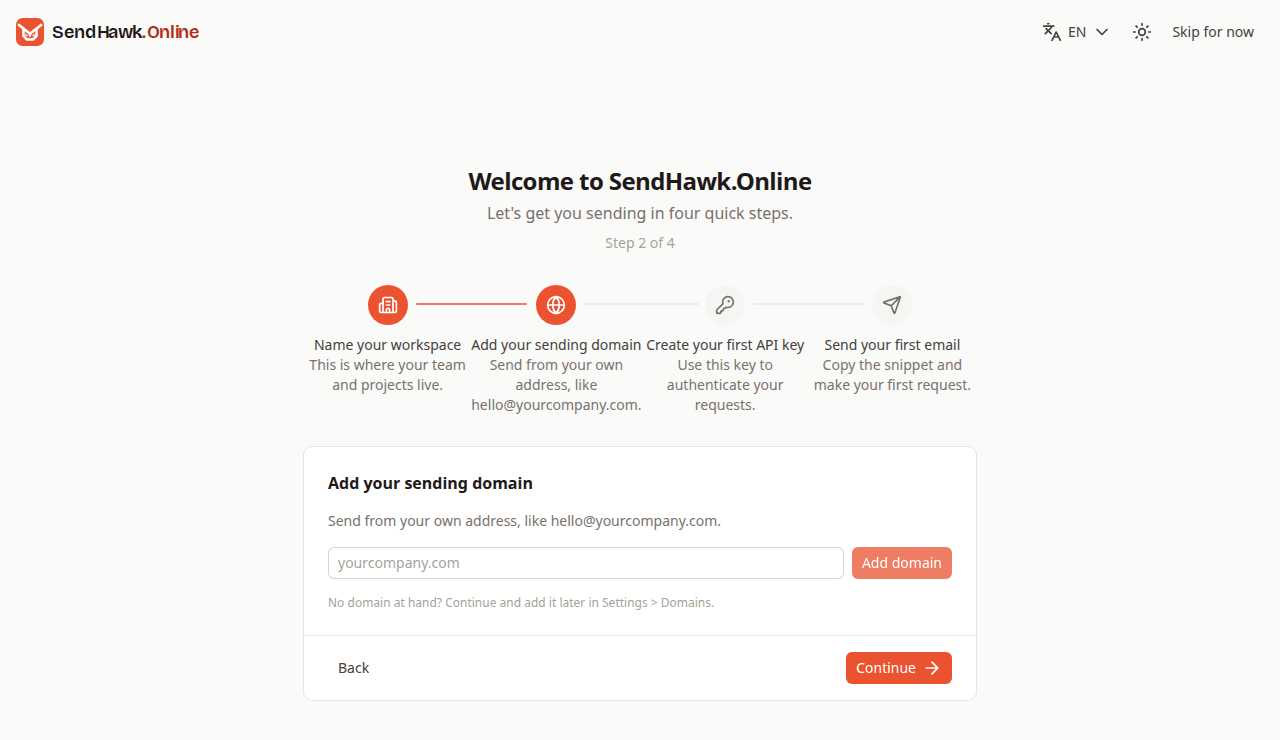
Enter the domain you will send from, such as yourcompany.com, without https:// or a path, and click Add domain. The step then shows the DNS records to publish, exactly as Domains does. This step is optional: Continue without a domain and add it later in Settings > Domains.
3. Create your first API key
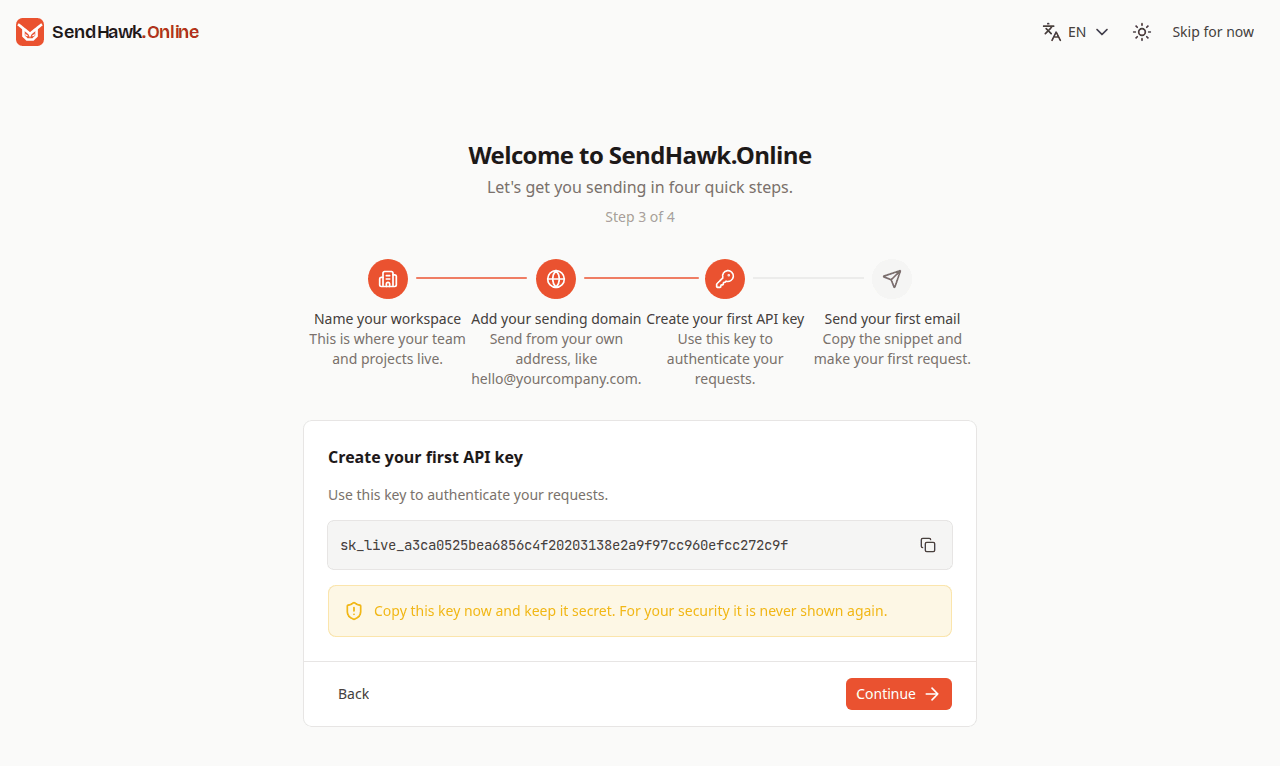
Reaching this step creates an API key named Onboarding key and shows it. Copy it with the copy button and store it in your environment or secret manager now: like every API key it is shown only this once. Each new visit to this step creates another key, so revoke any you do not use in API keys.
4. Send your first email
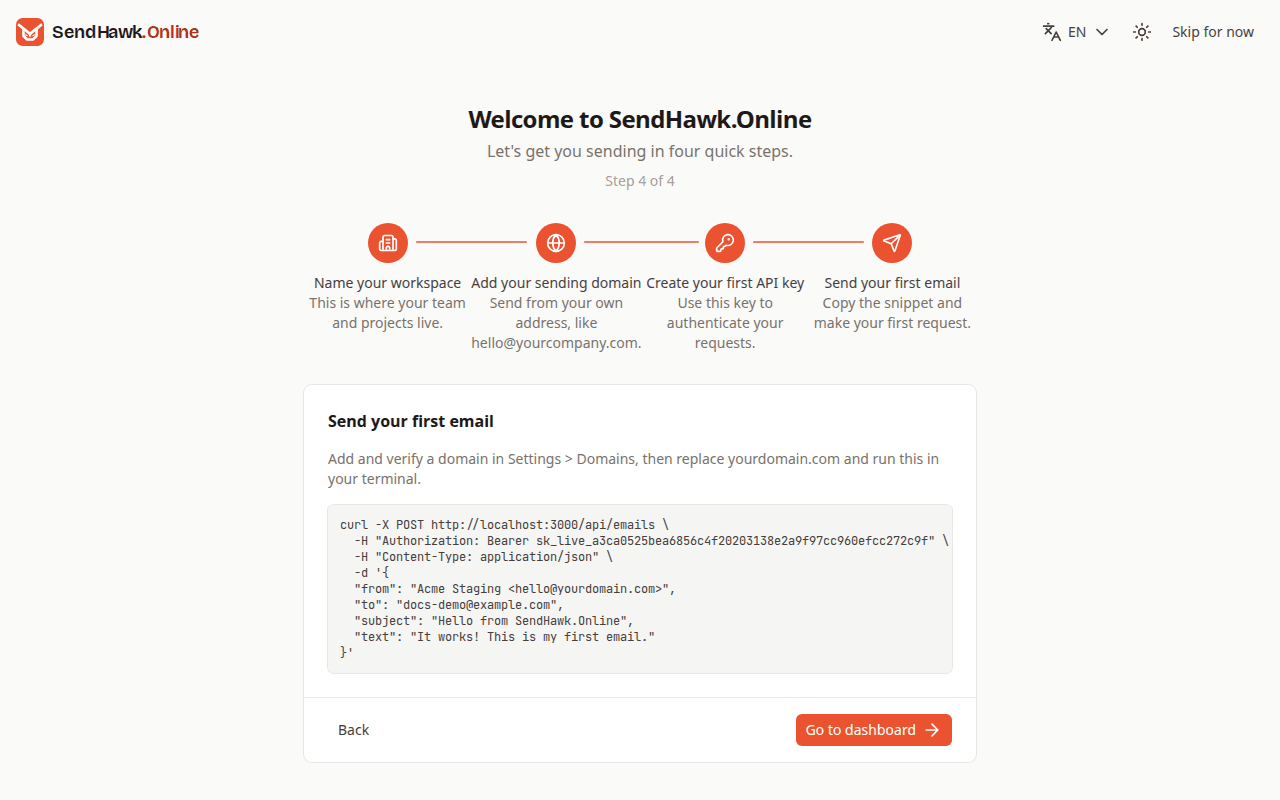
The last step is a curl command filled in with your new key, your workspace name as the sender name, the domain from step 2 (or yourdomain.com when you skipped it) and your own address as the recipient. It works as soon as the domain is verified. On SendHawk.Online it calls https://sendhawk.online/api/emails; the screenshot was taken on a development server, hence localhost. Go to dashboard finishes.
The Quickstart covers the same first send in more detail.